There was one restaurant there that cooked oven baked beans, fasolada, that was to die for. They had the beans in a huge pan, 20" x 50" that would only fit in an industrial oven. The beans were about 2" high and they were in a thick tomato sauce. Yum! I remember staring at the pan, salivating like Pavlov's dog.
In Hellas they use giant beans for this dish but I am having great difficulty finding these beans in the USA. So, like the versatile Odysseus that I am, I improvised and bought the beans that you see below. I followed the directions listed on the package to prepare the beans. HOWEVER, since in the end I wanted to bake the beans I followed the recipe to the final point where it stated that I should cook the beans in a pot for 1.5 - 2 hours. I cooked the beans (against their recommendation) for 1 hour only.
This recipe has three steps:
- Prepare the beans,
- Prepare the sauce,
- Put the beans and sauce together and bake.
STEP 1
Here are the beans soaking in water for one hour. This was the first step as I read it on the package.
Here are the beans after one hour of soaking. The beans look "terrible" but don't you worry because they will "regain" their shape.
After the first step I cooked the beans in a pot for one hour. Again, I followed the directions in the package.
I set the range timer because I had to prepare the sauce.
STEP 2
While the beans are cooking I took:
- two medium onions, roughly chopped,
- four garlic cloves, roughly chopped,
- and two medium carrots, roughly chopped.
I diced the onions, garlic, and carrots.
I also used about one cup's worth of dill.
Then I had to do something to distract Raspy. She would NOT like this dish and you don't want to get her mad at you either. I was so lucky that we had in the refrigerator leftover salmon from a recent lunch we had. Raspy ate most of this but she left a few pieces that were too rich for her delicate mouth. Of course, she never cleans up after herself and I would have to it for her.
I added two tablespoons of olive oil and warmed it up using medium heat. I added the onions and cooked them for about six minutes. Then I added the carrots and cooked them for three minutes. Finally I added the garlic and cooked this mixture for another two minutes.
I grabbed a 28oz can of diced tomatoes and added that into the pan. To open cans I've purchased this fantastic can opener that removes the lid and there are NO SHARP EDGES! I love it because afterwards the cleaning of the can is very easy and safe. At the same time I added the dill...
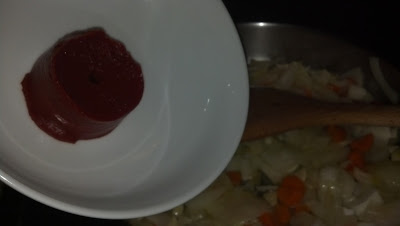
and two tablespoons of tomato paste. By adding tomato paste to a dish you make sure that the food will thicken. I gave it a good stir and cooked this mixture for 20 minutes.
By this time the beans had cooked for one hour. I drained them in a colander, washed them with cold water, and I separated them into two oven-safe dishes. If you had a dish that will hold everything, use it.
STEP 3
After 20 minutes of cooking the tomato/onions mixture I added 1/2 of it into the dishes with the beans and gave them a good stir.
Dish #1
This looks nice.
Dish 32
I sprinkled a little olive over on the mixture, covered the two pans with aluminum foil and inserted them into a 350°F oven for 60 minutes. After 30 minutes I checked the mixture because I wanted to make sure it was sufficiently moist. If it weren't, I would add 1/2 a cup of water and give it a stir.
Here are the beans right out of the oven.
Here is my dinner: the beans, some feta cheese and some ciabatta bread...perfection. YUM!
This recipe stores well in the refrigerator. If you choose to refrigerate it, you can warm t up by putting some olive oil in a pan and add the cold mixture.
Happy cooking trails.


No comments:
Post a Comment